
 Mini App-IDE How-to
# 1. Mini App-IDE basic usage
# 1.1 Create a new MiniApp and open it
First click the plus sign in Mini App-IDE to enter the page where the MiniApp is created. In the newly opened page, you need to enter the project name, project directory, project type of the Mini App, and select the project template to create a new Mini App.
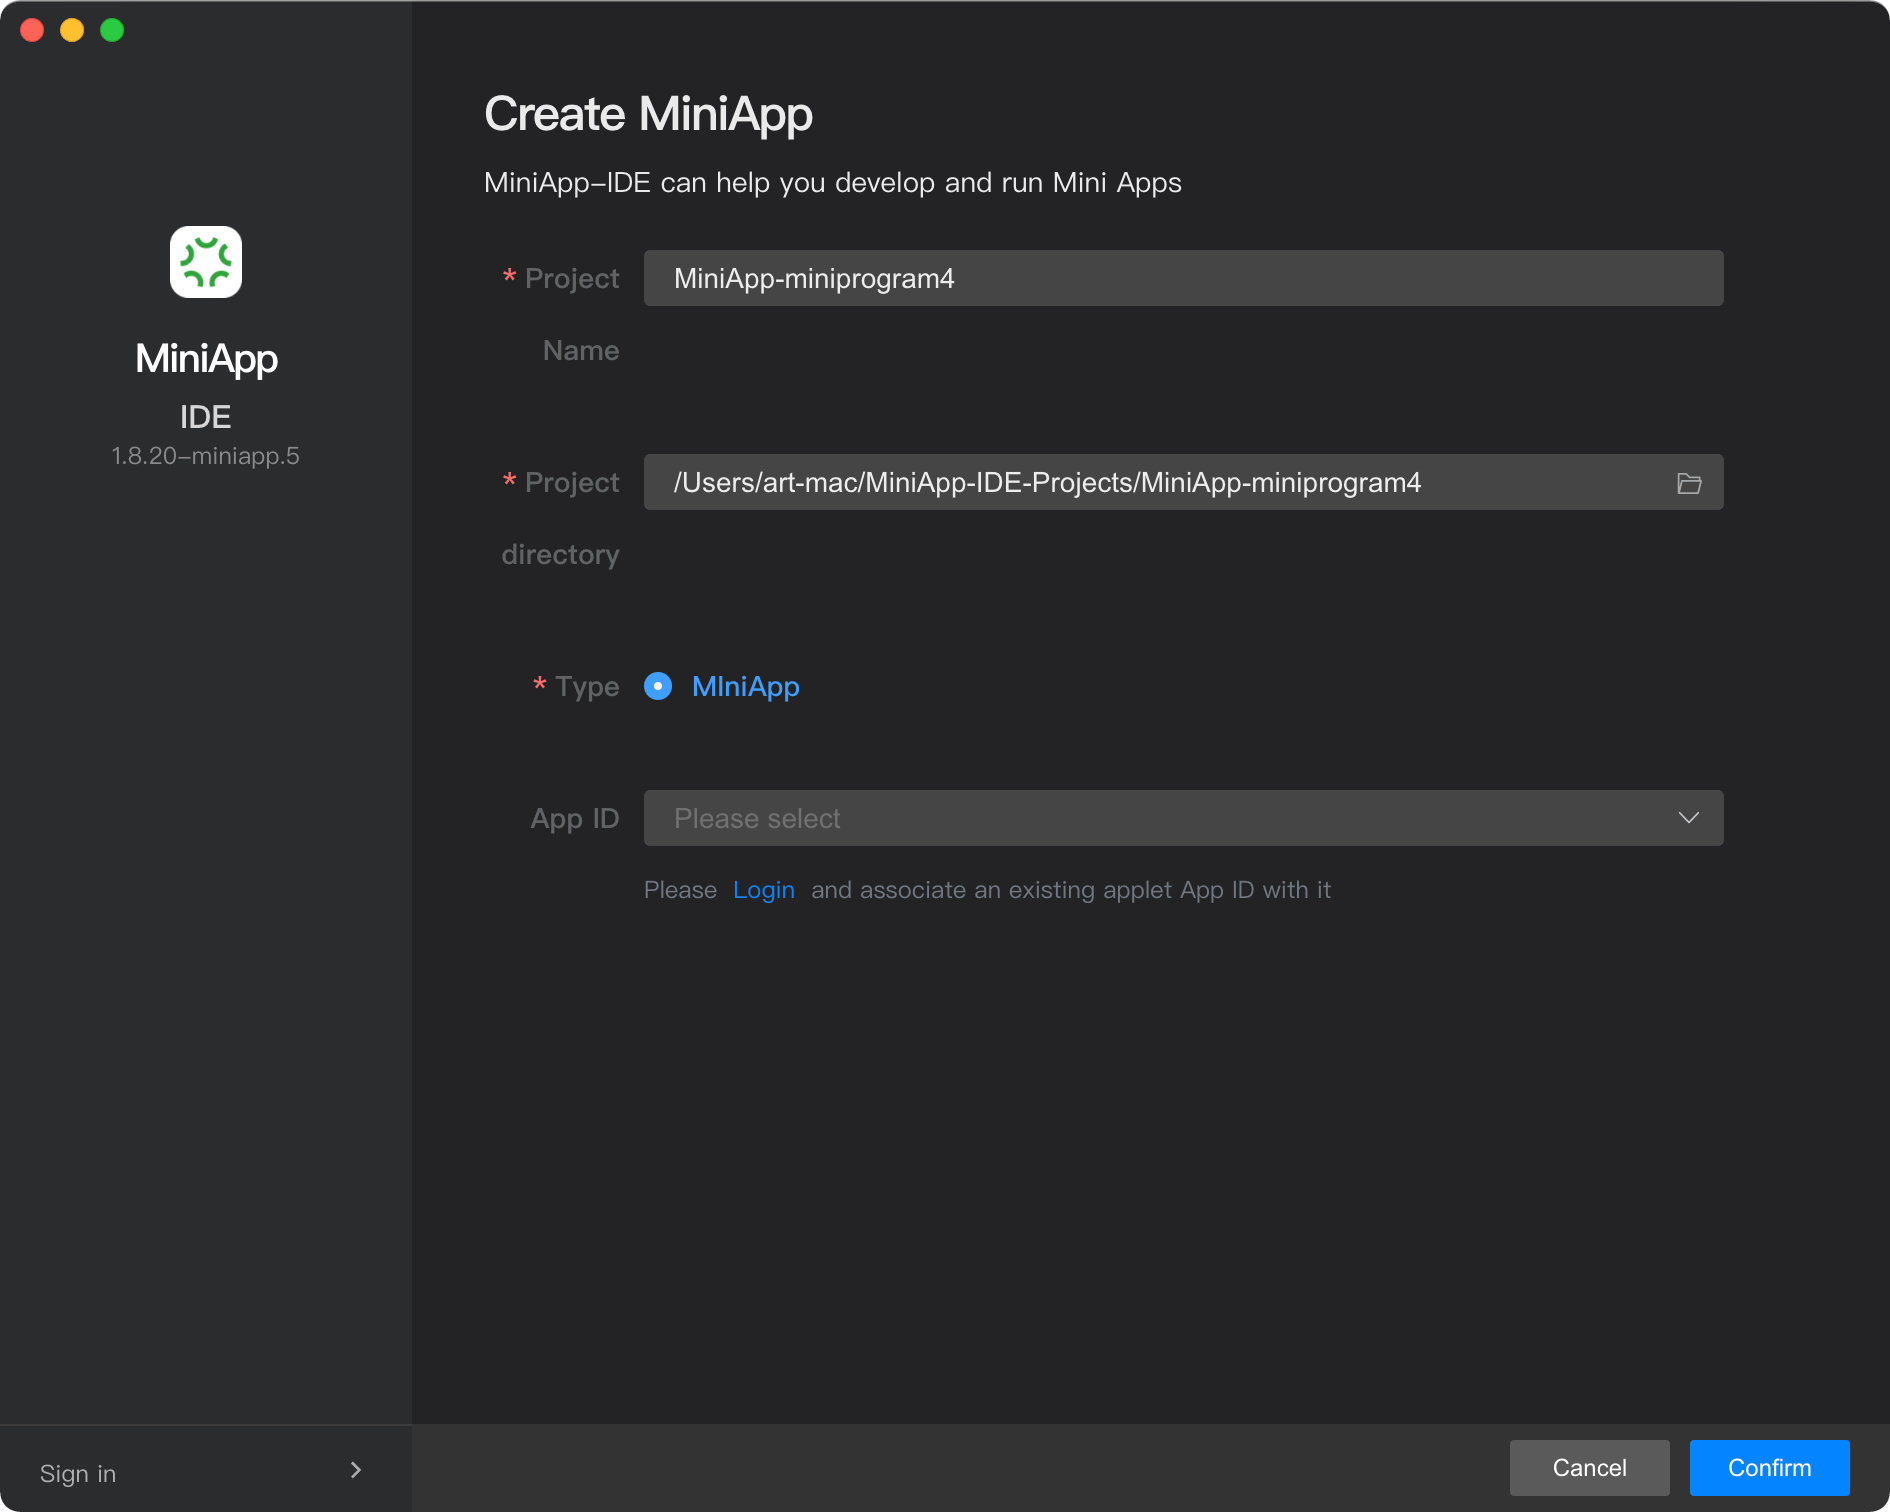 If the directory you select is a non-empty directory, Mini App-IDE will prompt you to skip the MiniApp creation process and open the MiniApp directly.
# 1.2 IDE Overview
!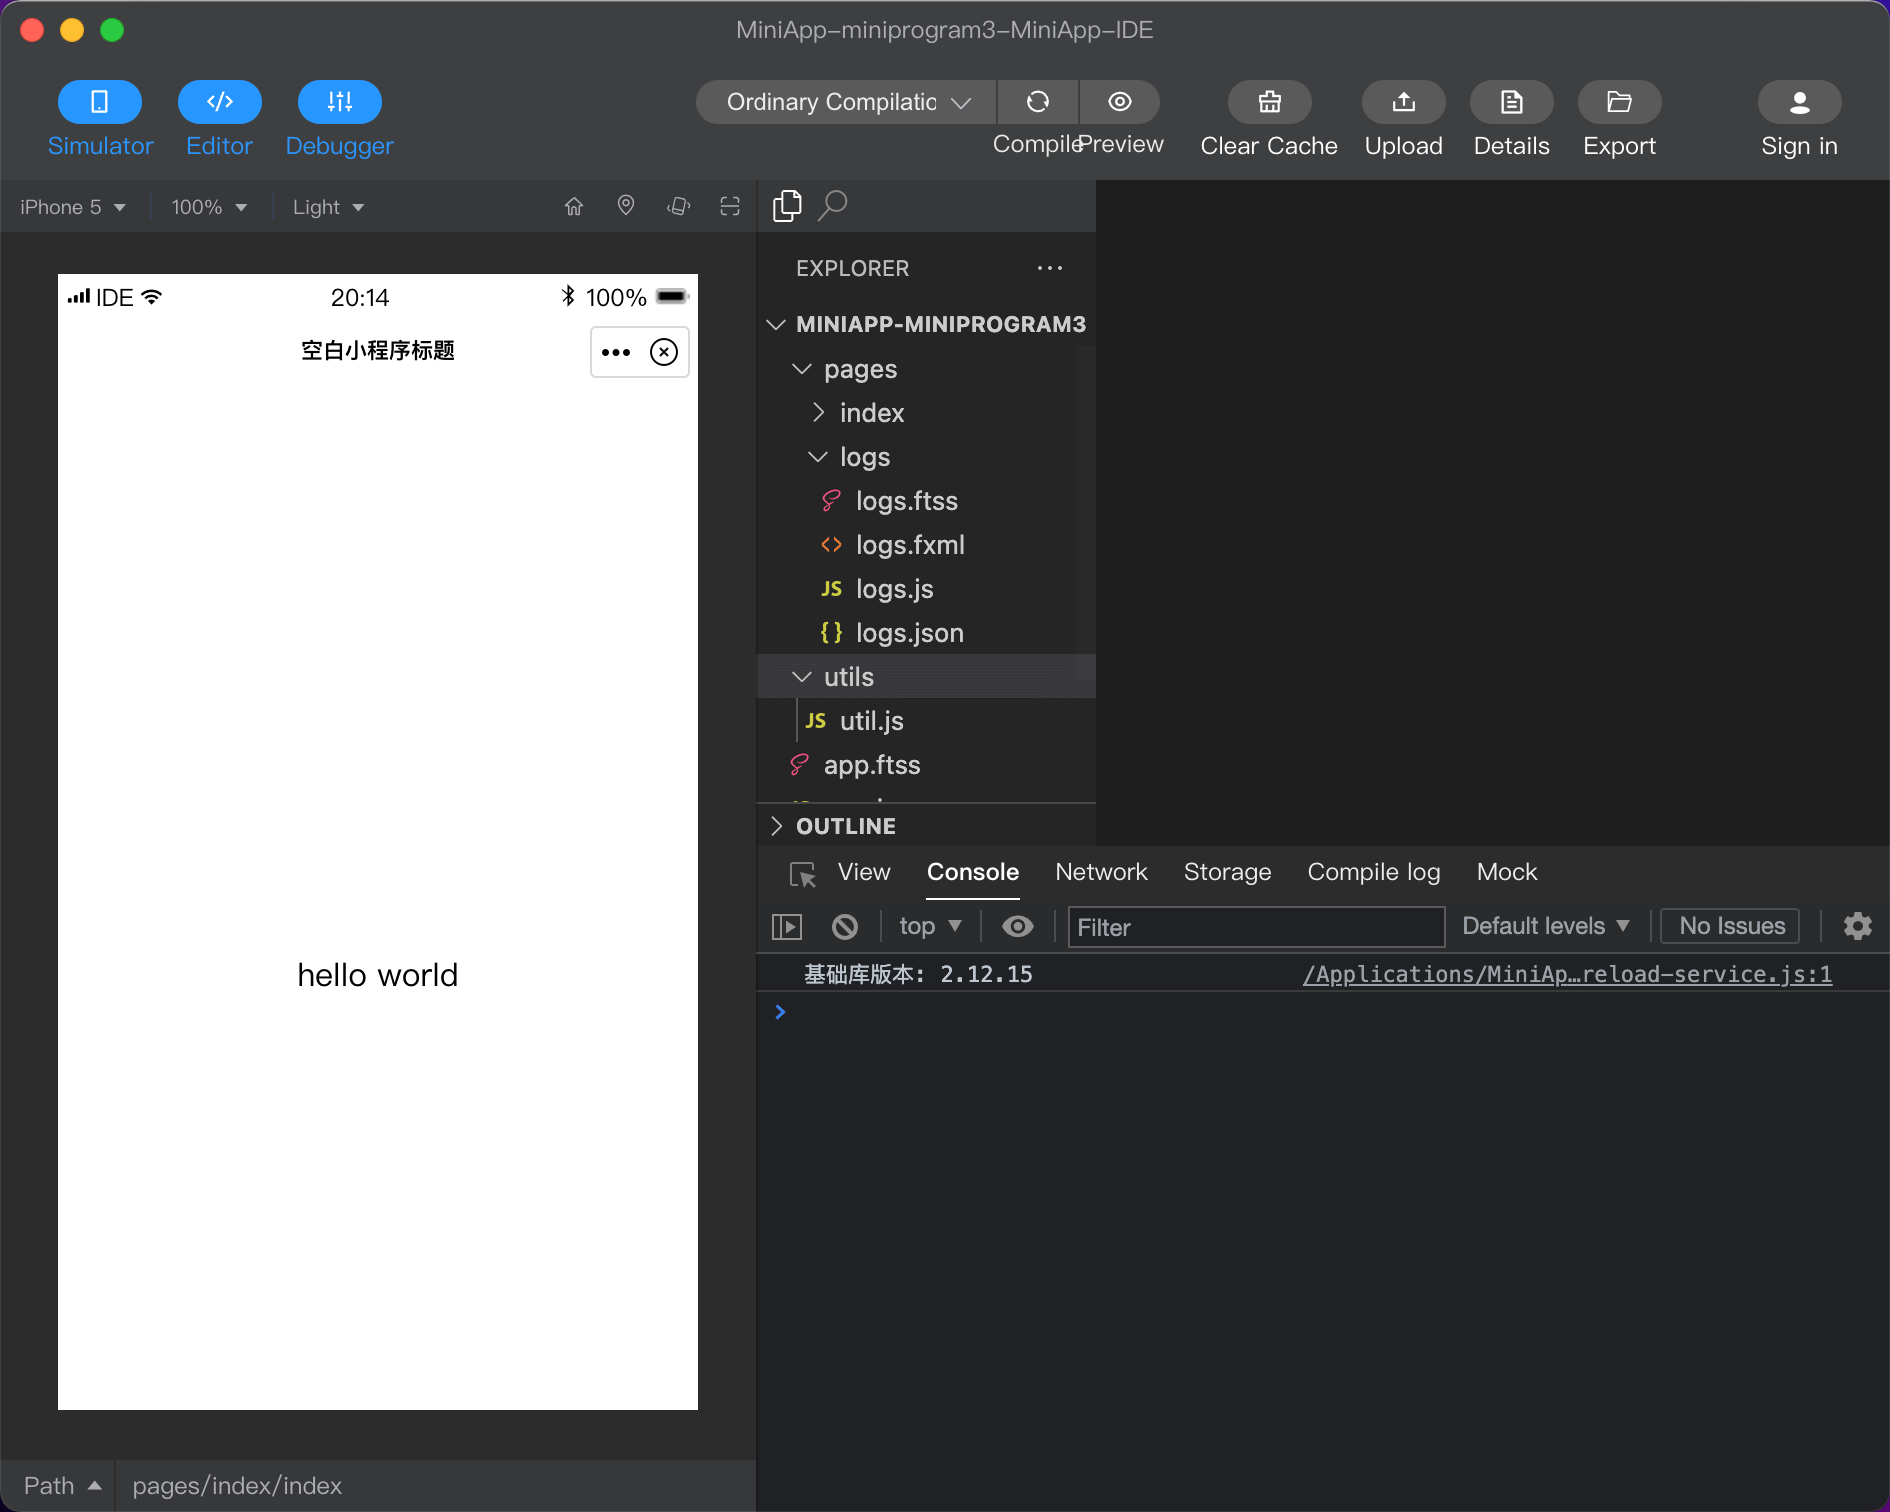 When you finish creating the Mini App (or opening the Mini App), you will enter the Mini App Overview page, which is composed of toolbar, emulator, file manager, content editor, debugger, you can click the left directory or here See the introduction.
# 1.3 Mini App Simulation Debugging
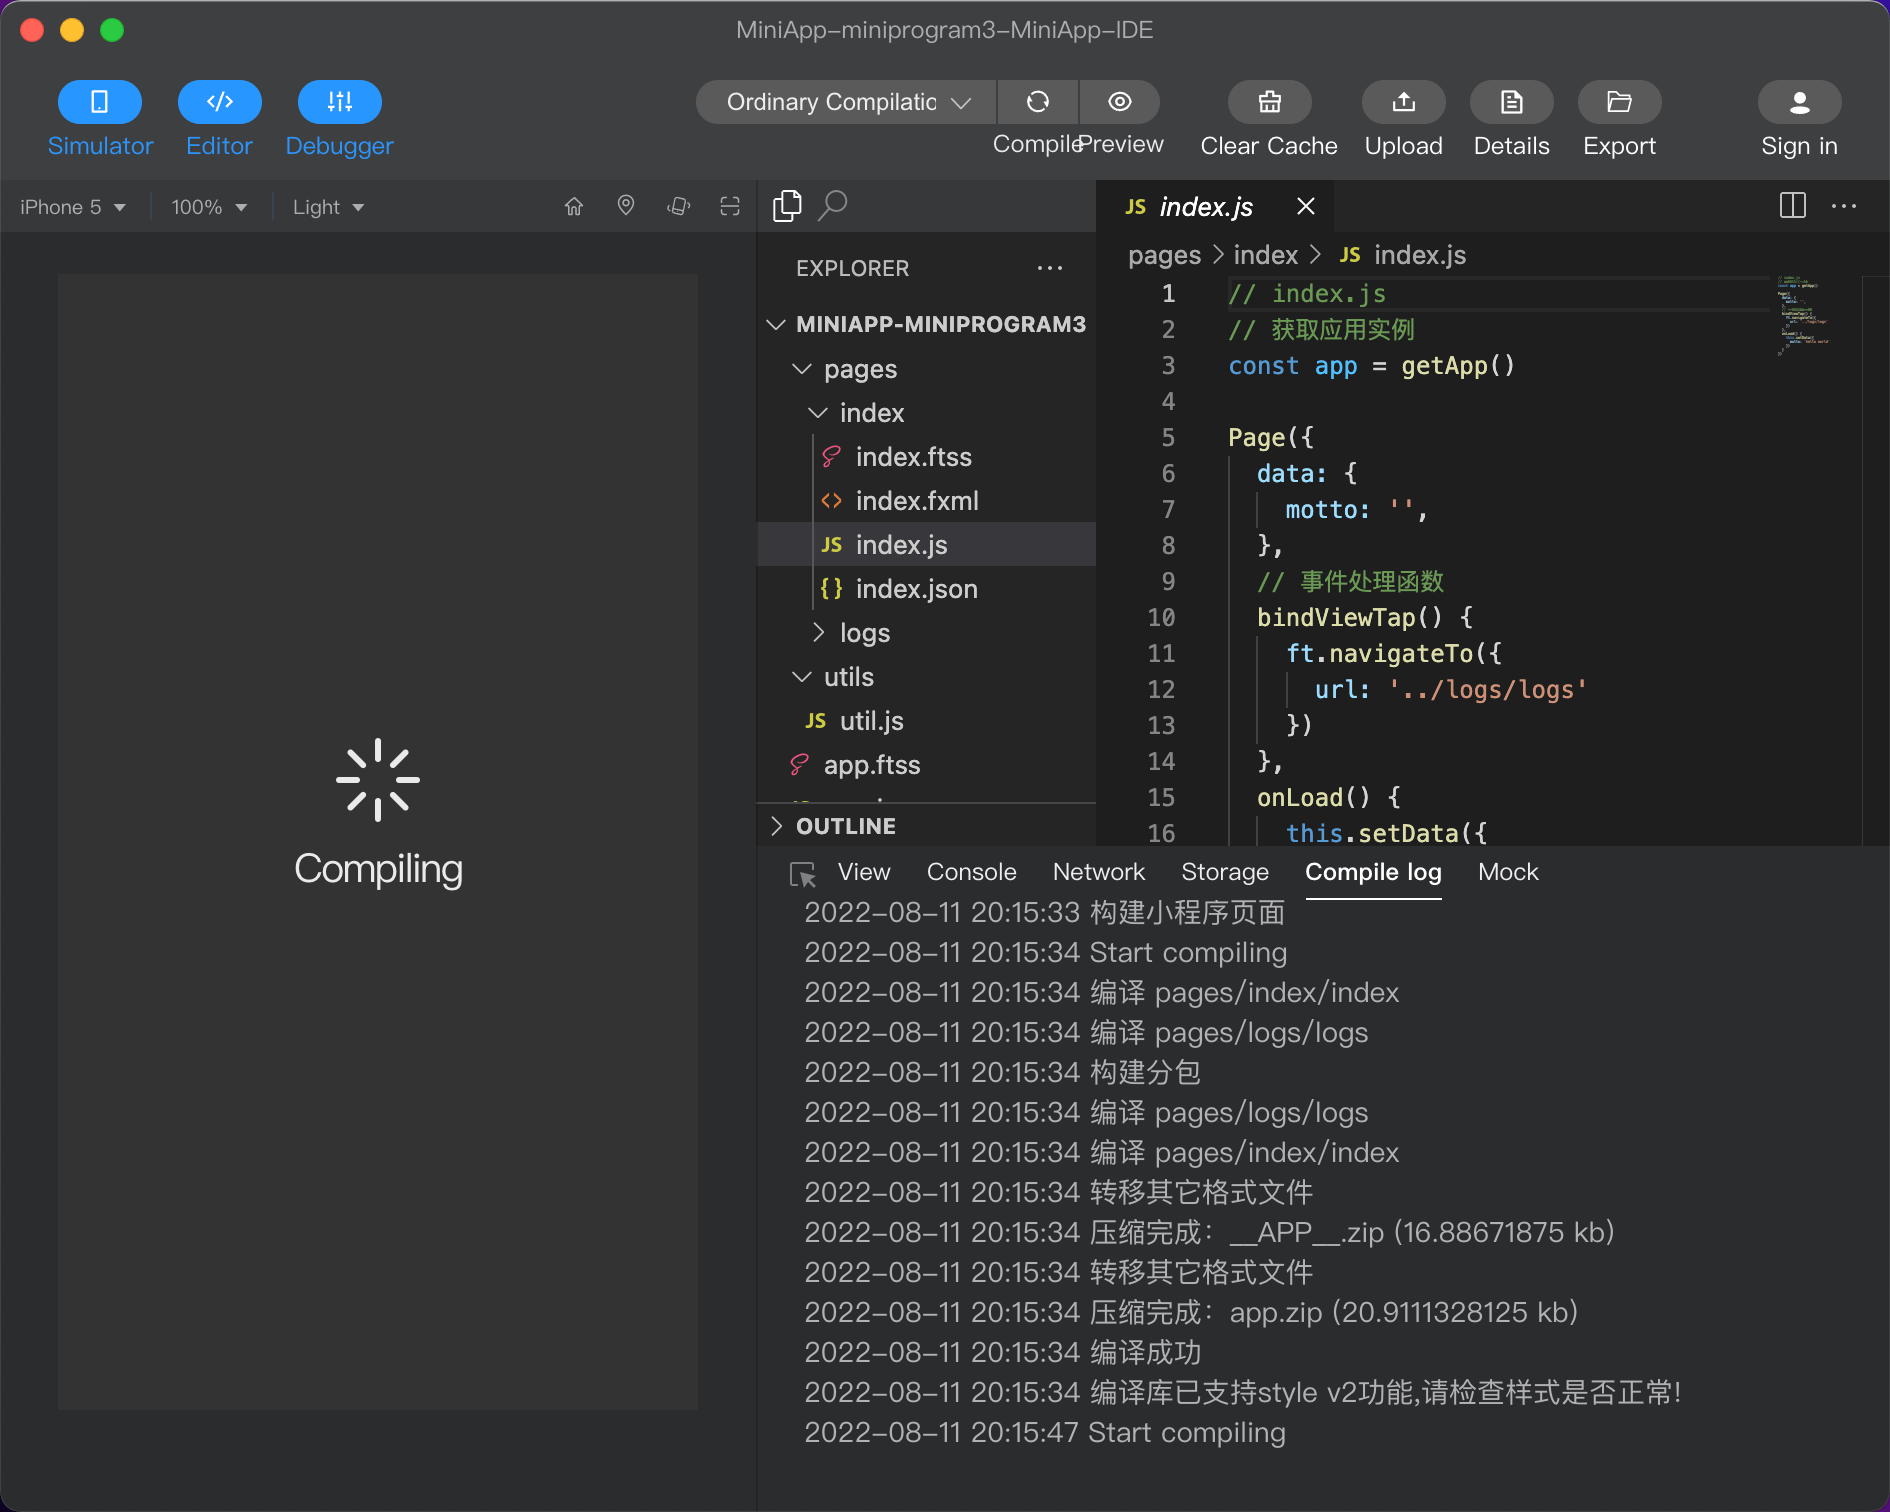 When you modify the Mini App code in the editor, you can click "Compile" in the top toolbar (or trigger the save automatic compilation by the shortcut key Command(Ctrl)+S), and you can see the corresponding effect of the Modified Mini App code in the emulator on the left.
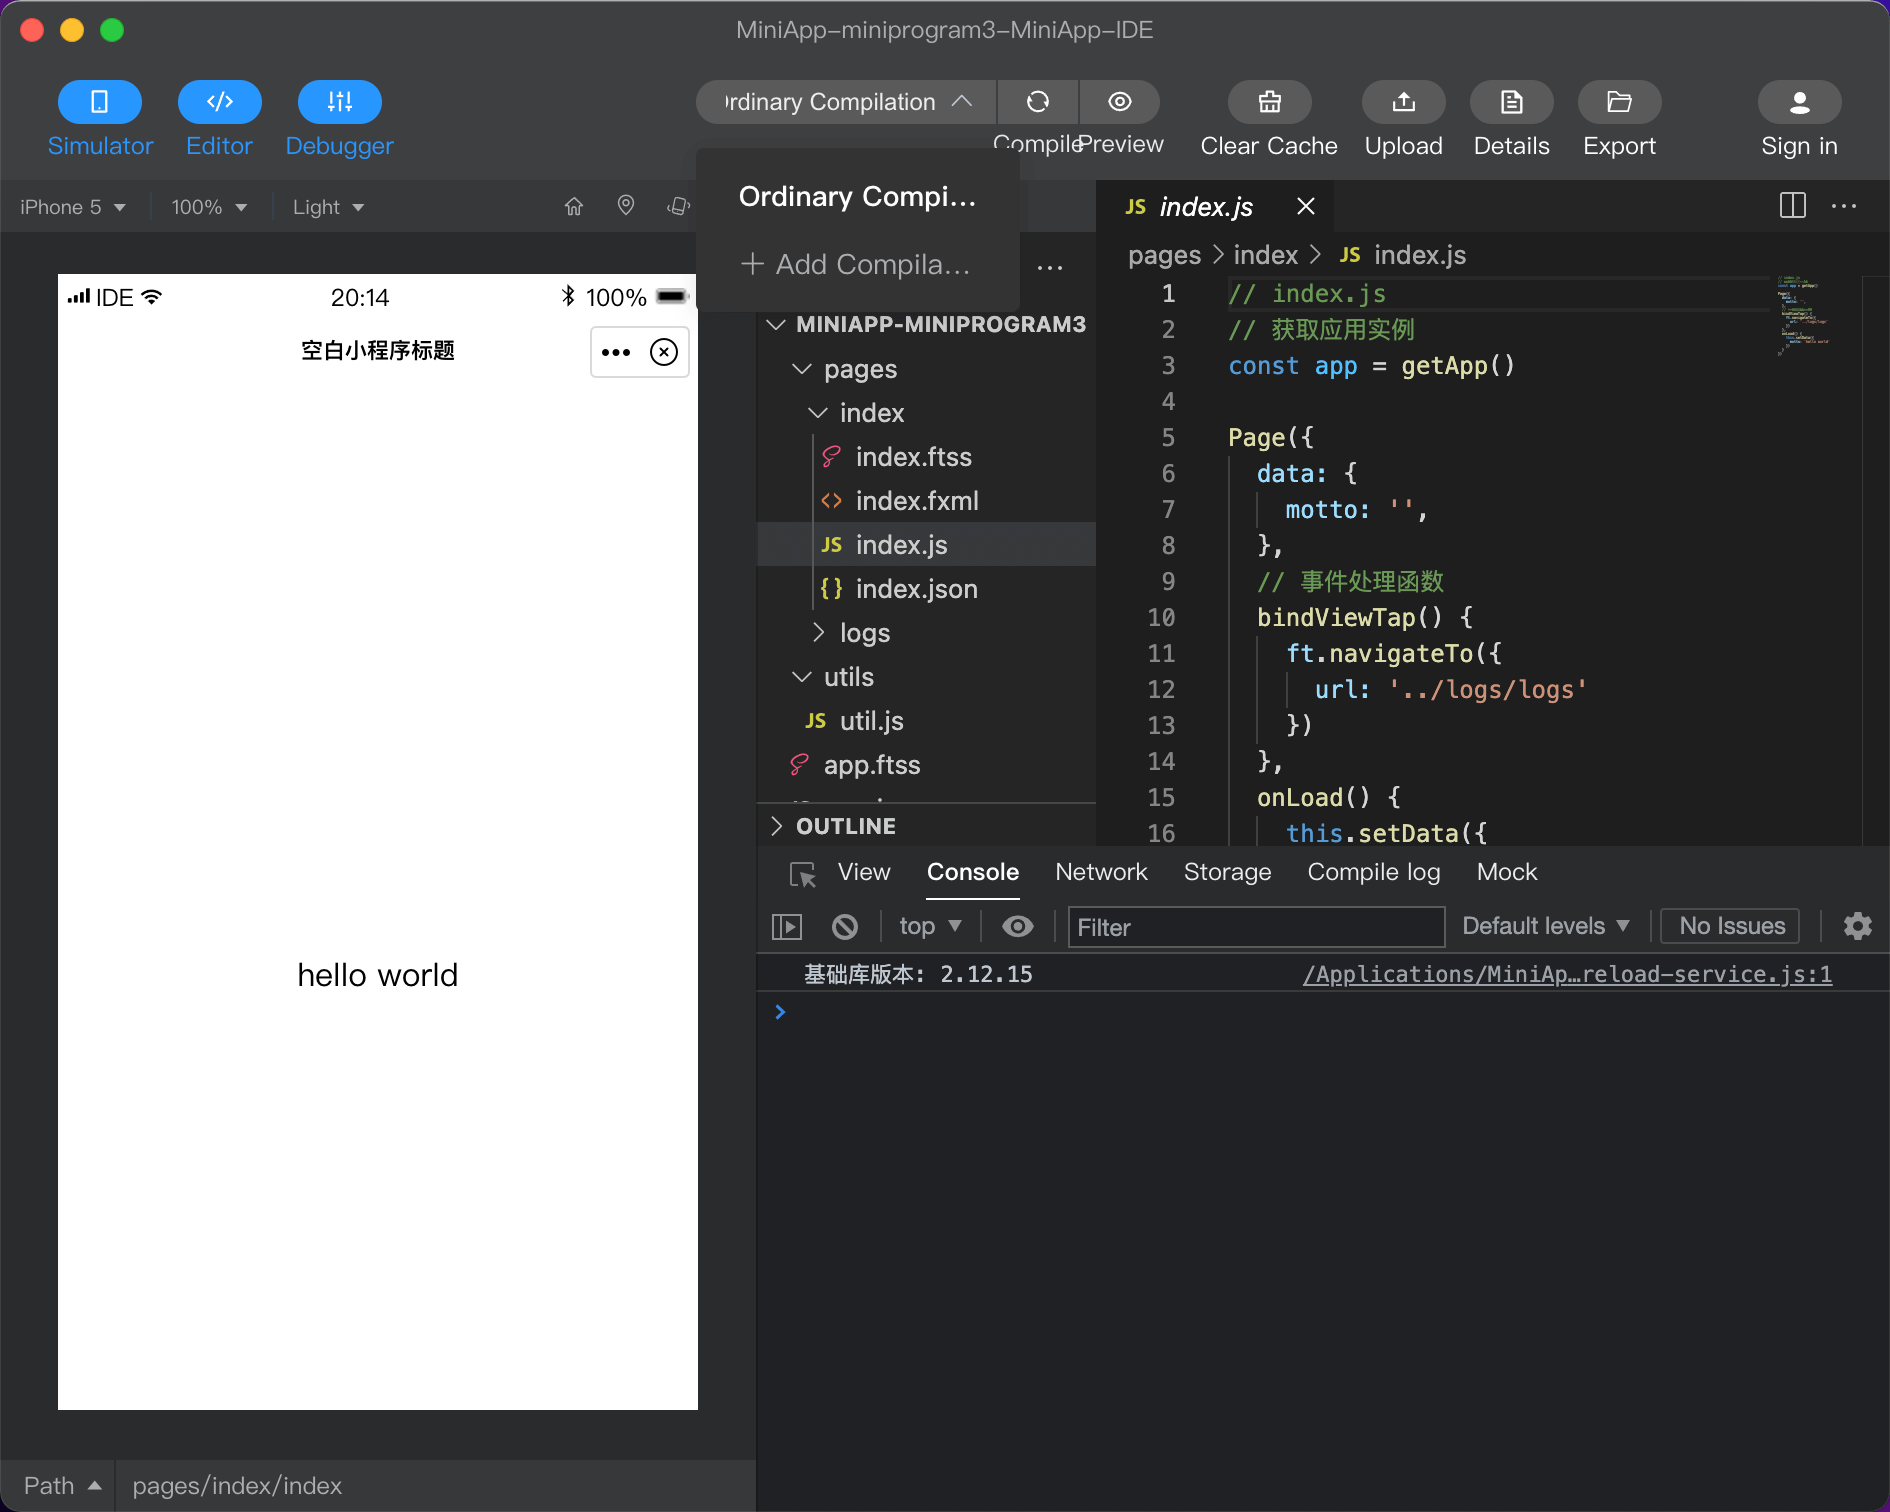 If you have a special scene that needs to be customized, you can also click "Add Compilation Mode" in the top toolbar, and in the pop-up window, add the mode name, start page, start parameters several fields, click Confirm, generate new compilation conditions.
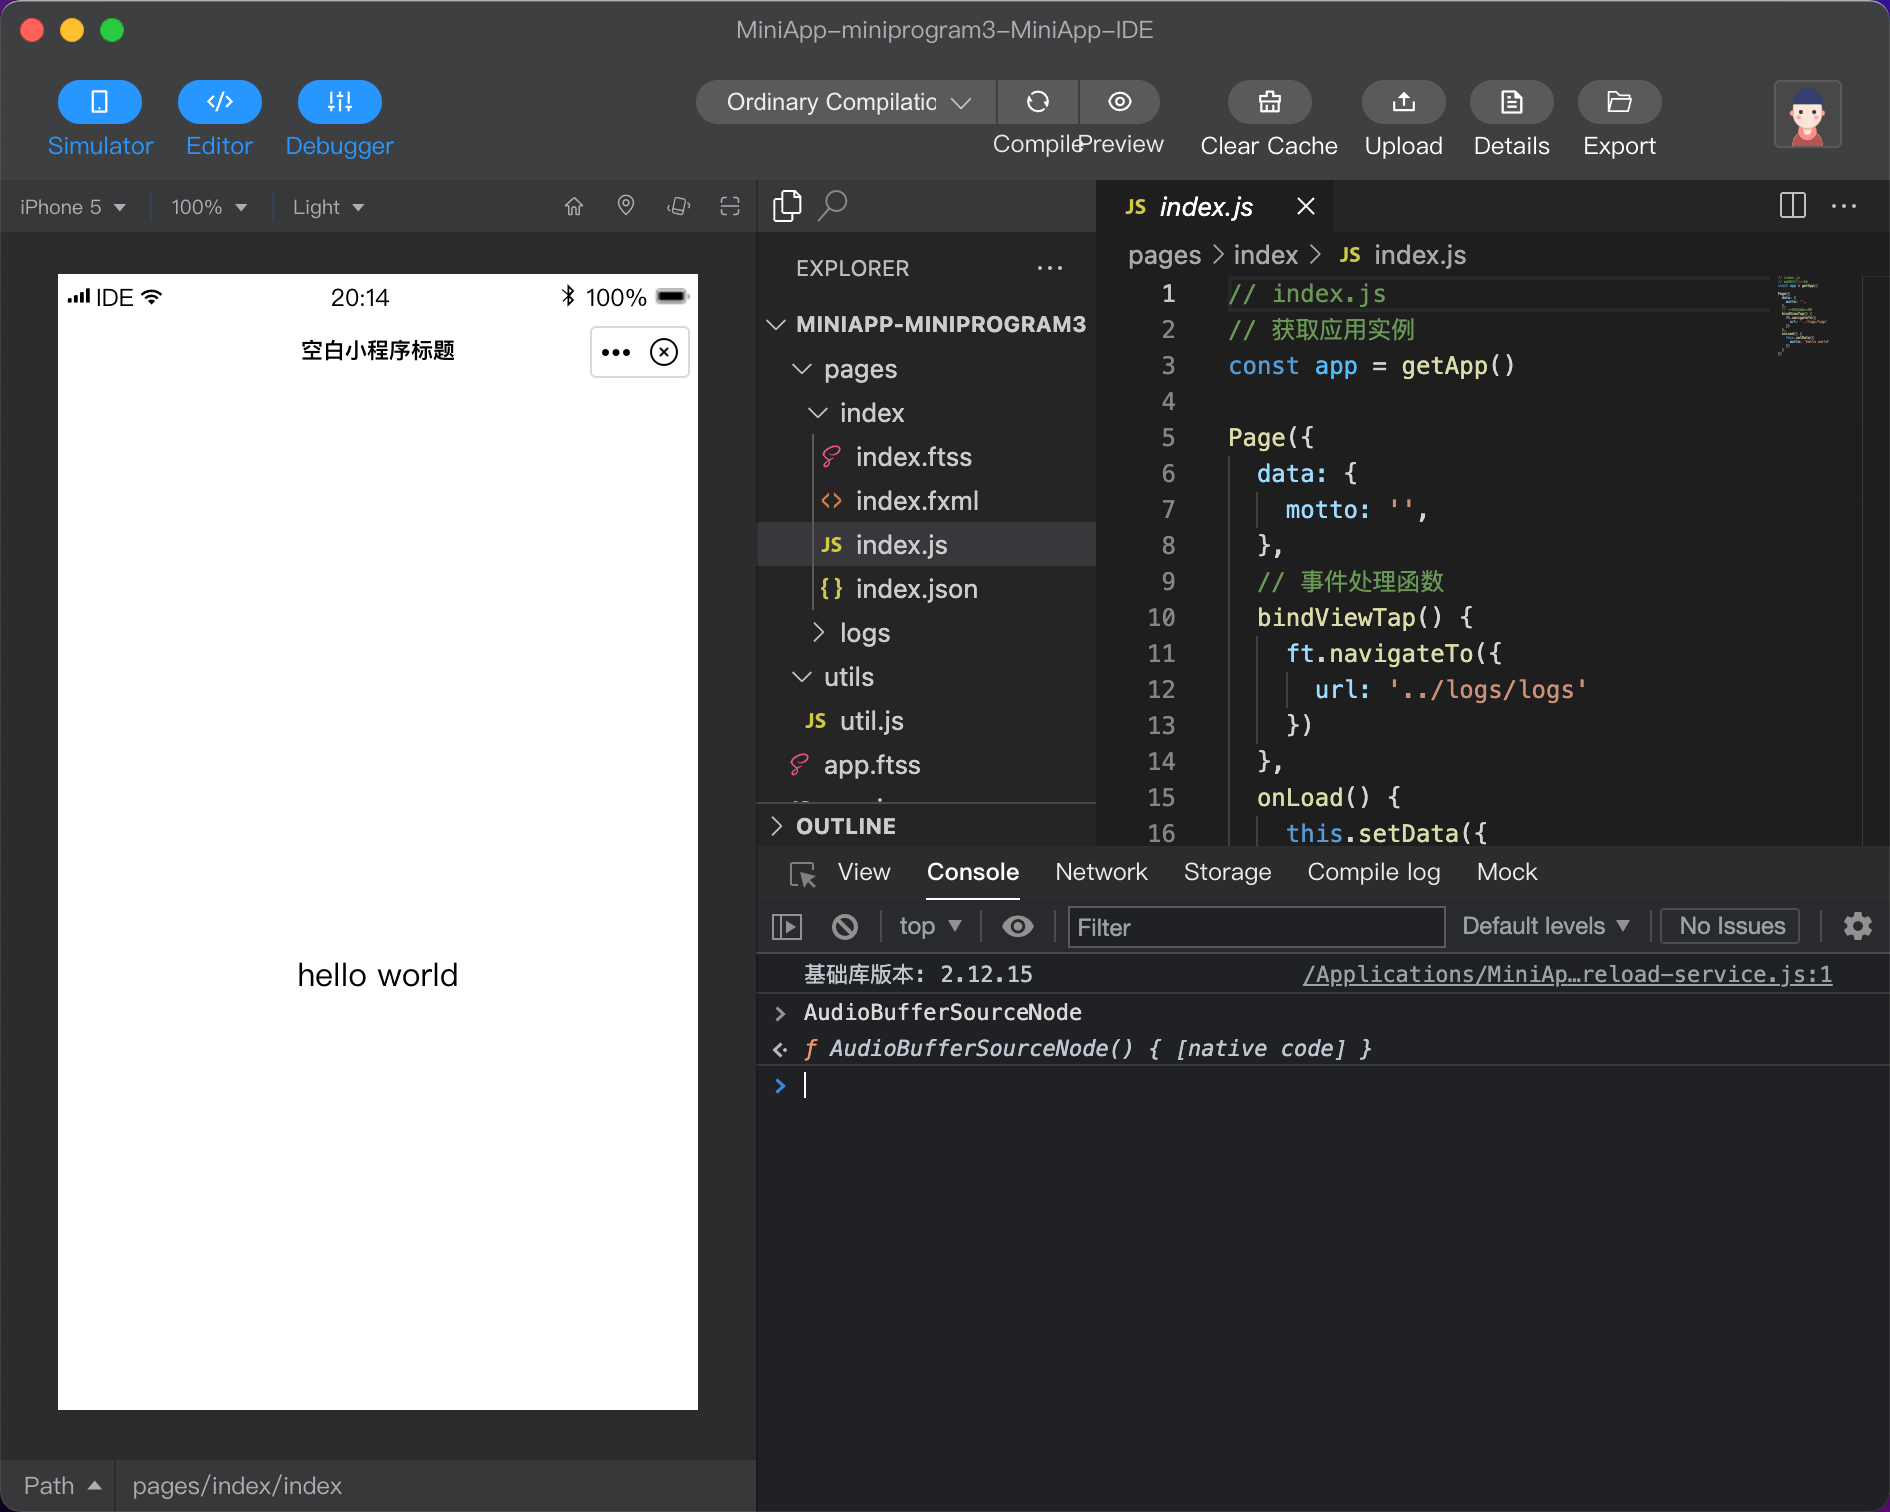 You can also run the MiniApp APIs directly from the Log panel at the bottom for fast debugging.
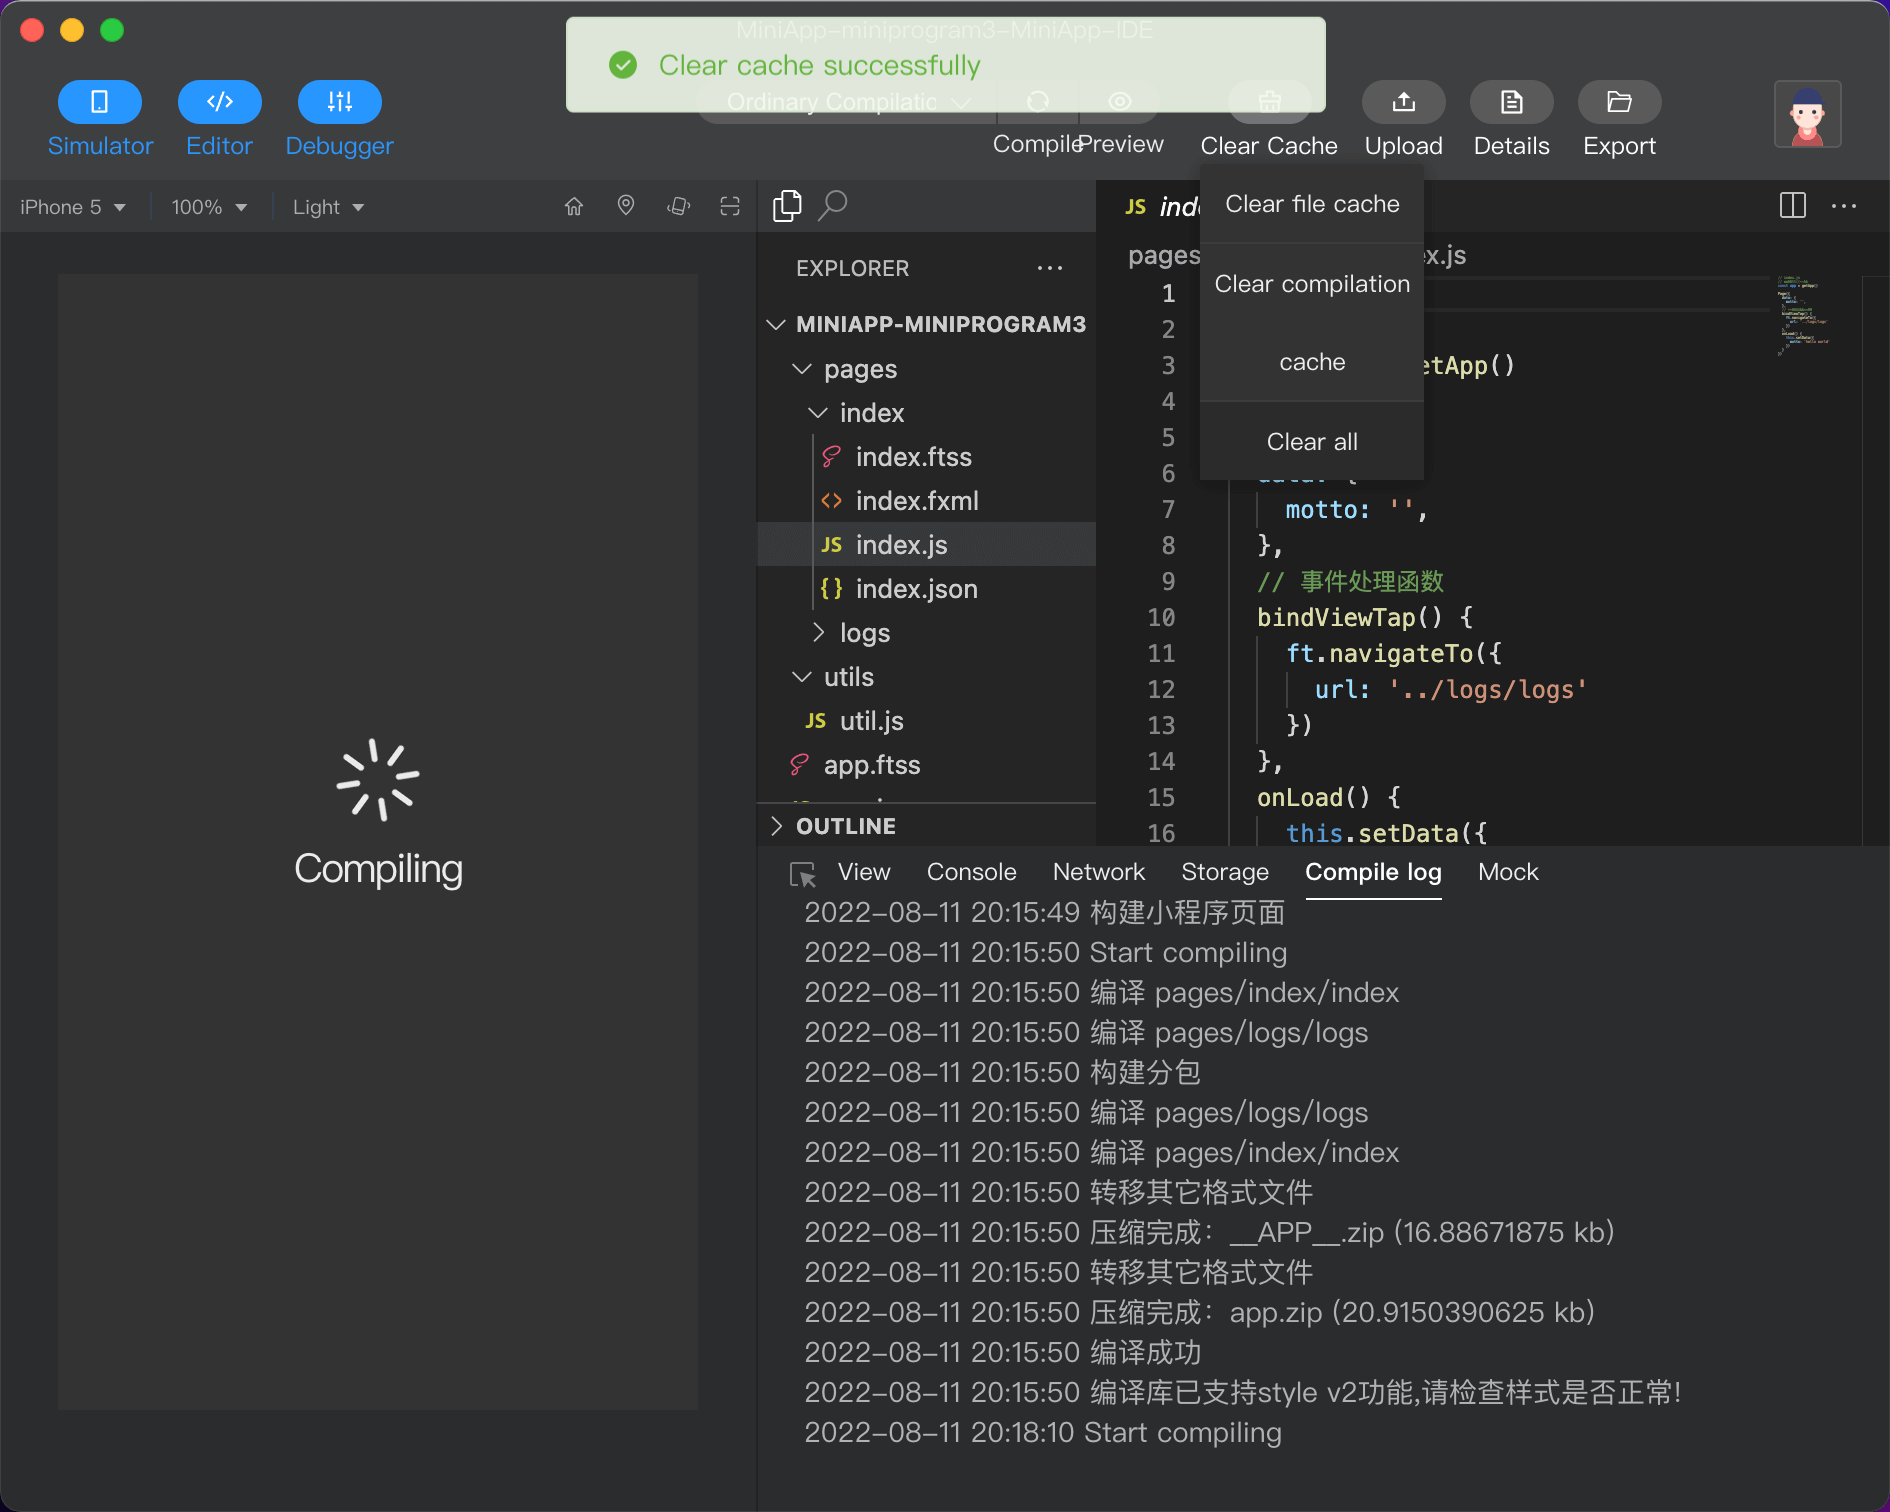 When you find problems that may be caused by caching during debugging the Mini App, you can click "Clear Cache" at the top and choose to clear the file cache or compile the cache according to your needs.
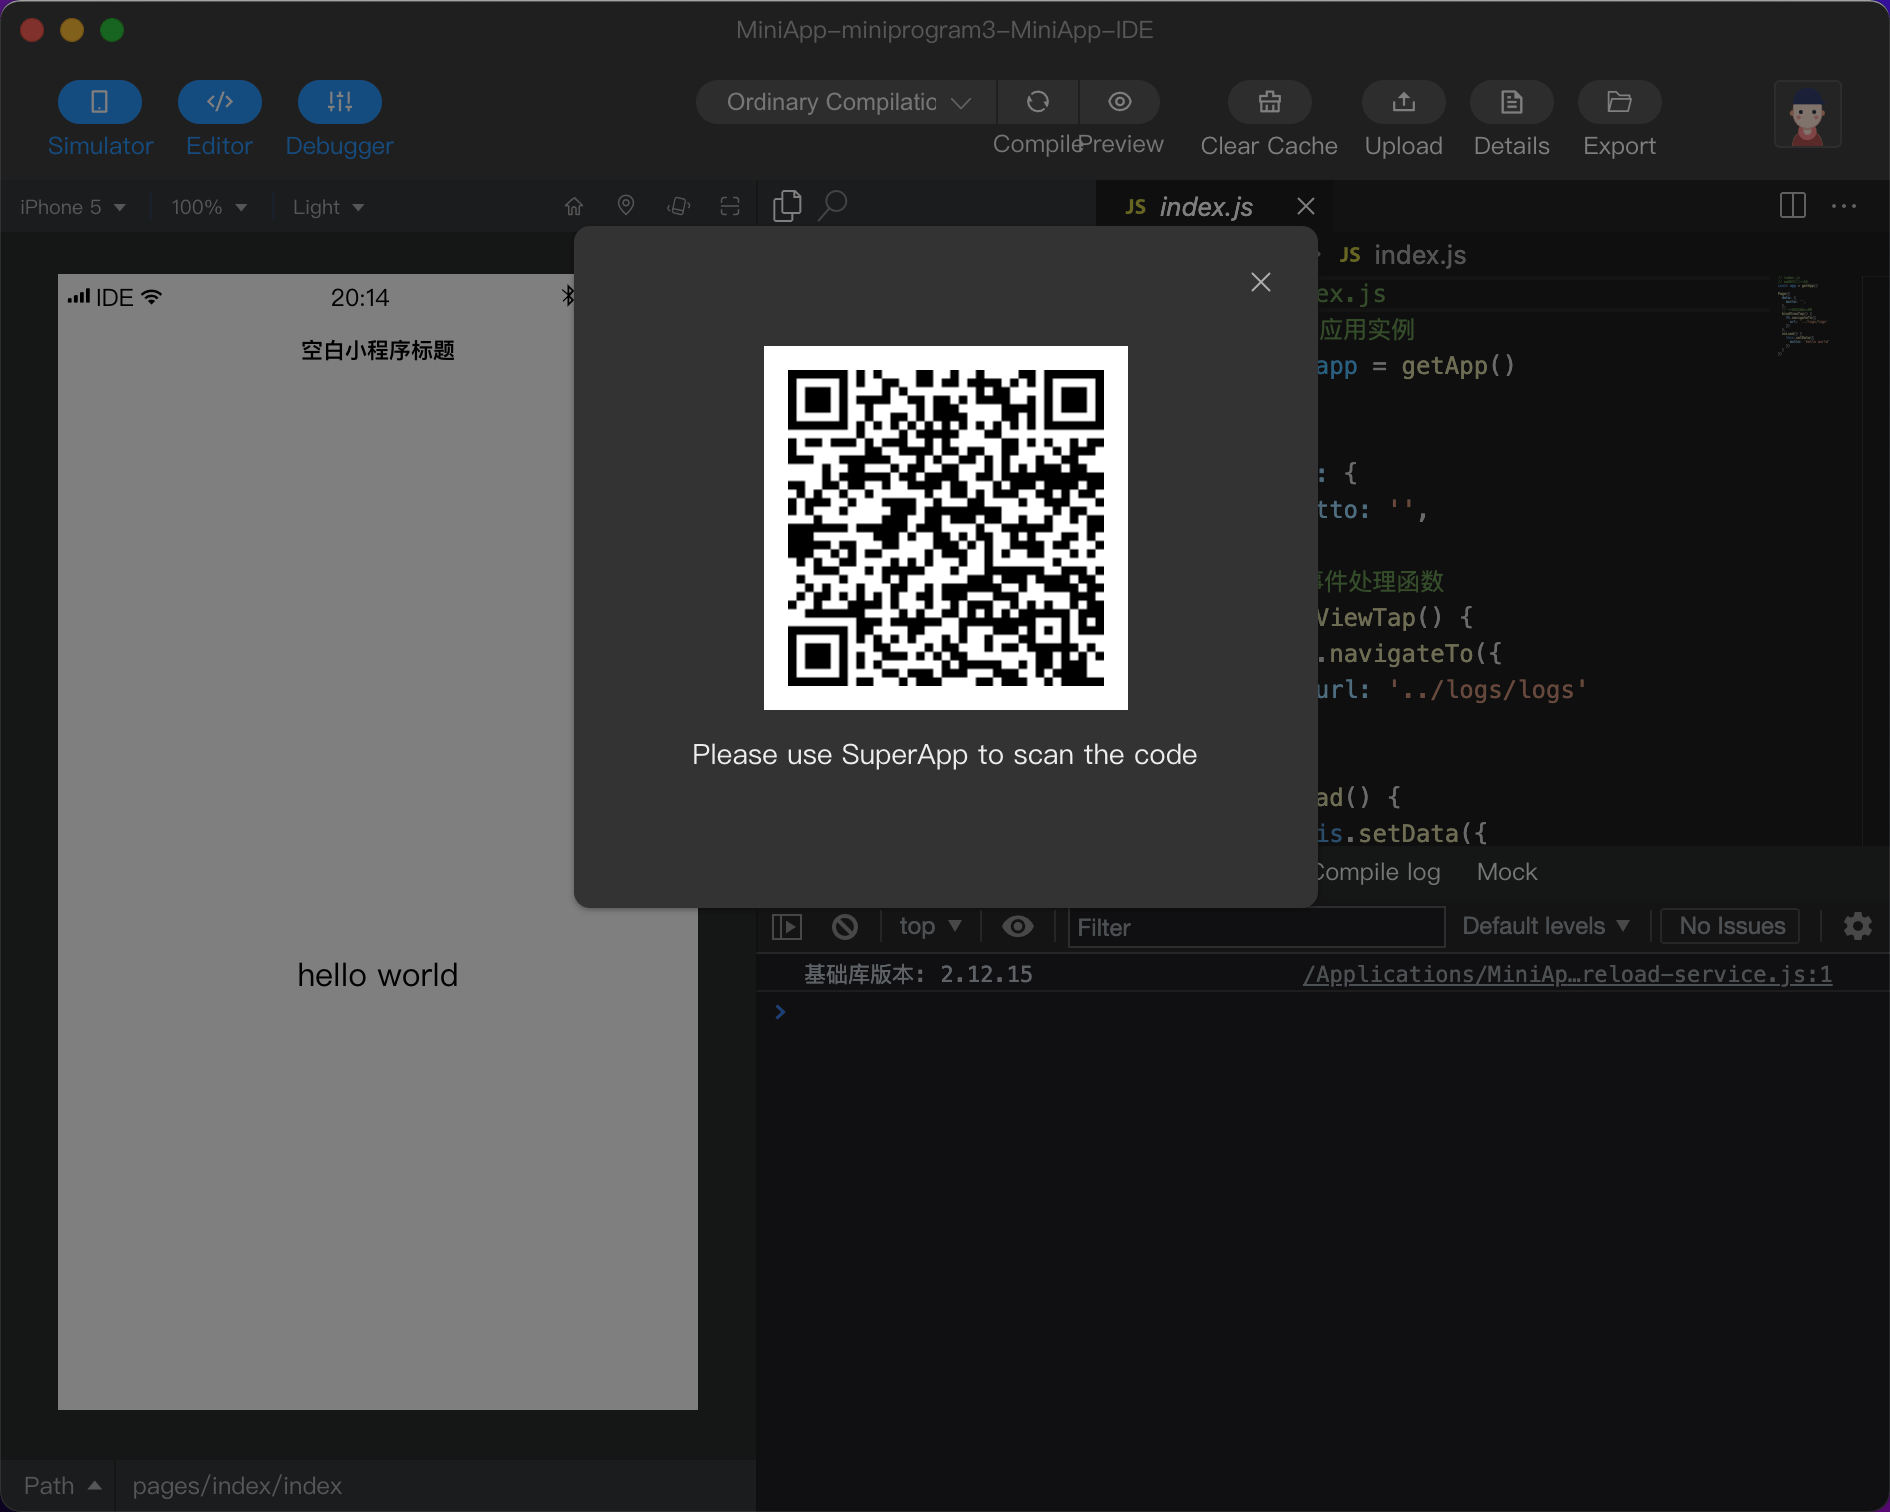 Click "Preview" in the top toolbar to display a QR code that can open the Mini App, you can open the Mini App in the Neuxnet App or your own App by scanning the QR code to preview the development process.
# 1.4 MiniApp Details
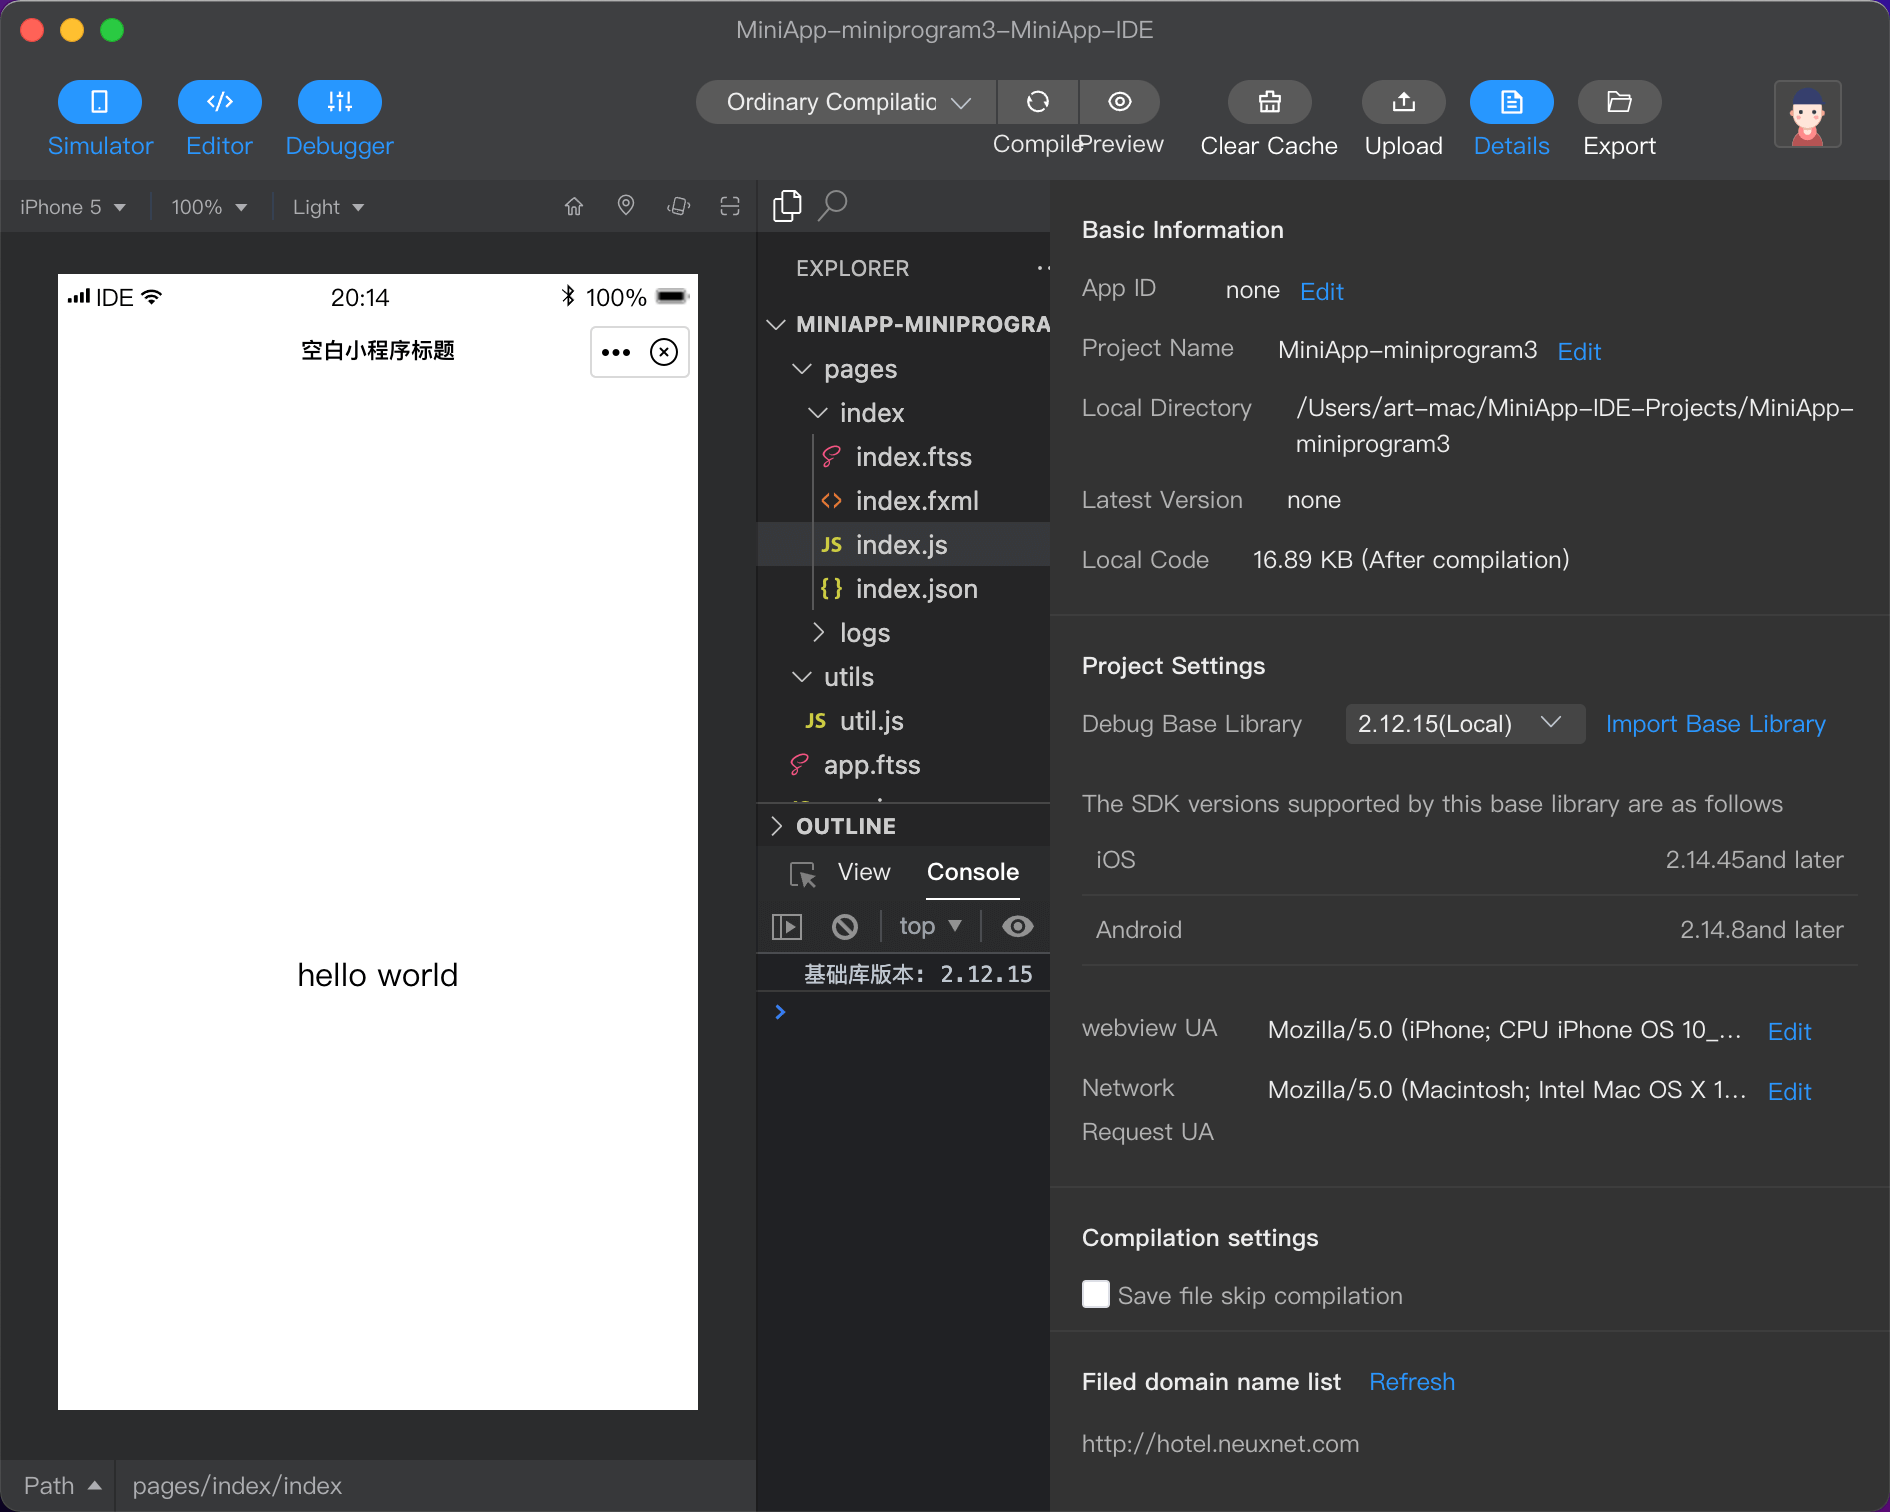 You can click the "Details" button at the top to view the details of the Mini App currently being compiled, which includes the basic information of the current Mini App, local settings, compilation settings and ICP Filing domain name information (only displayed after logging in):
- Basic information: the basic information of the Mini App, such as App ID, project name, local directory, online latest version, and code size after compilation;
- Local settings: local Mini App base library version, UA information;
- Compilation settings: configure whether compilation is required when saving files;
- List of registered domain names: When you are logged in, the domain name information you set in Neuxnet will be loaded, such as the case where the resource loading fails after the Mini App is previewed and uploaded locally, please check here.
# 1.5 Mini App Upload
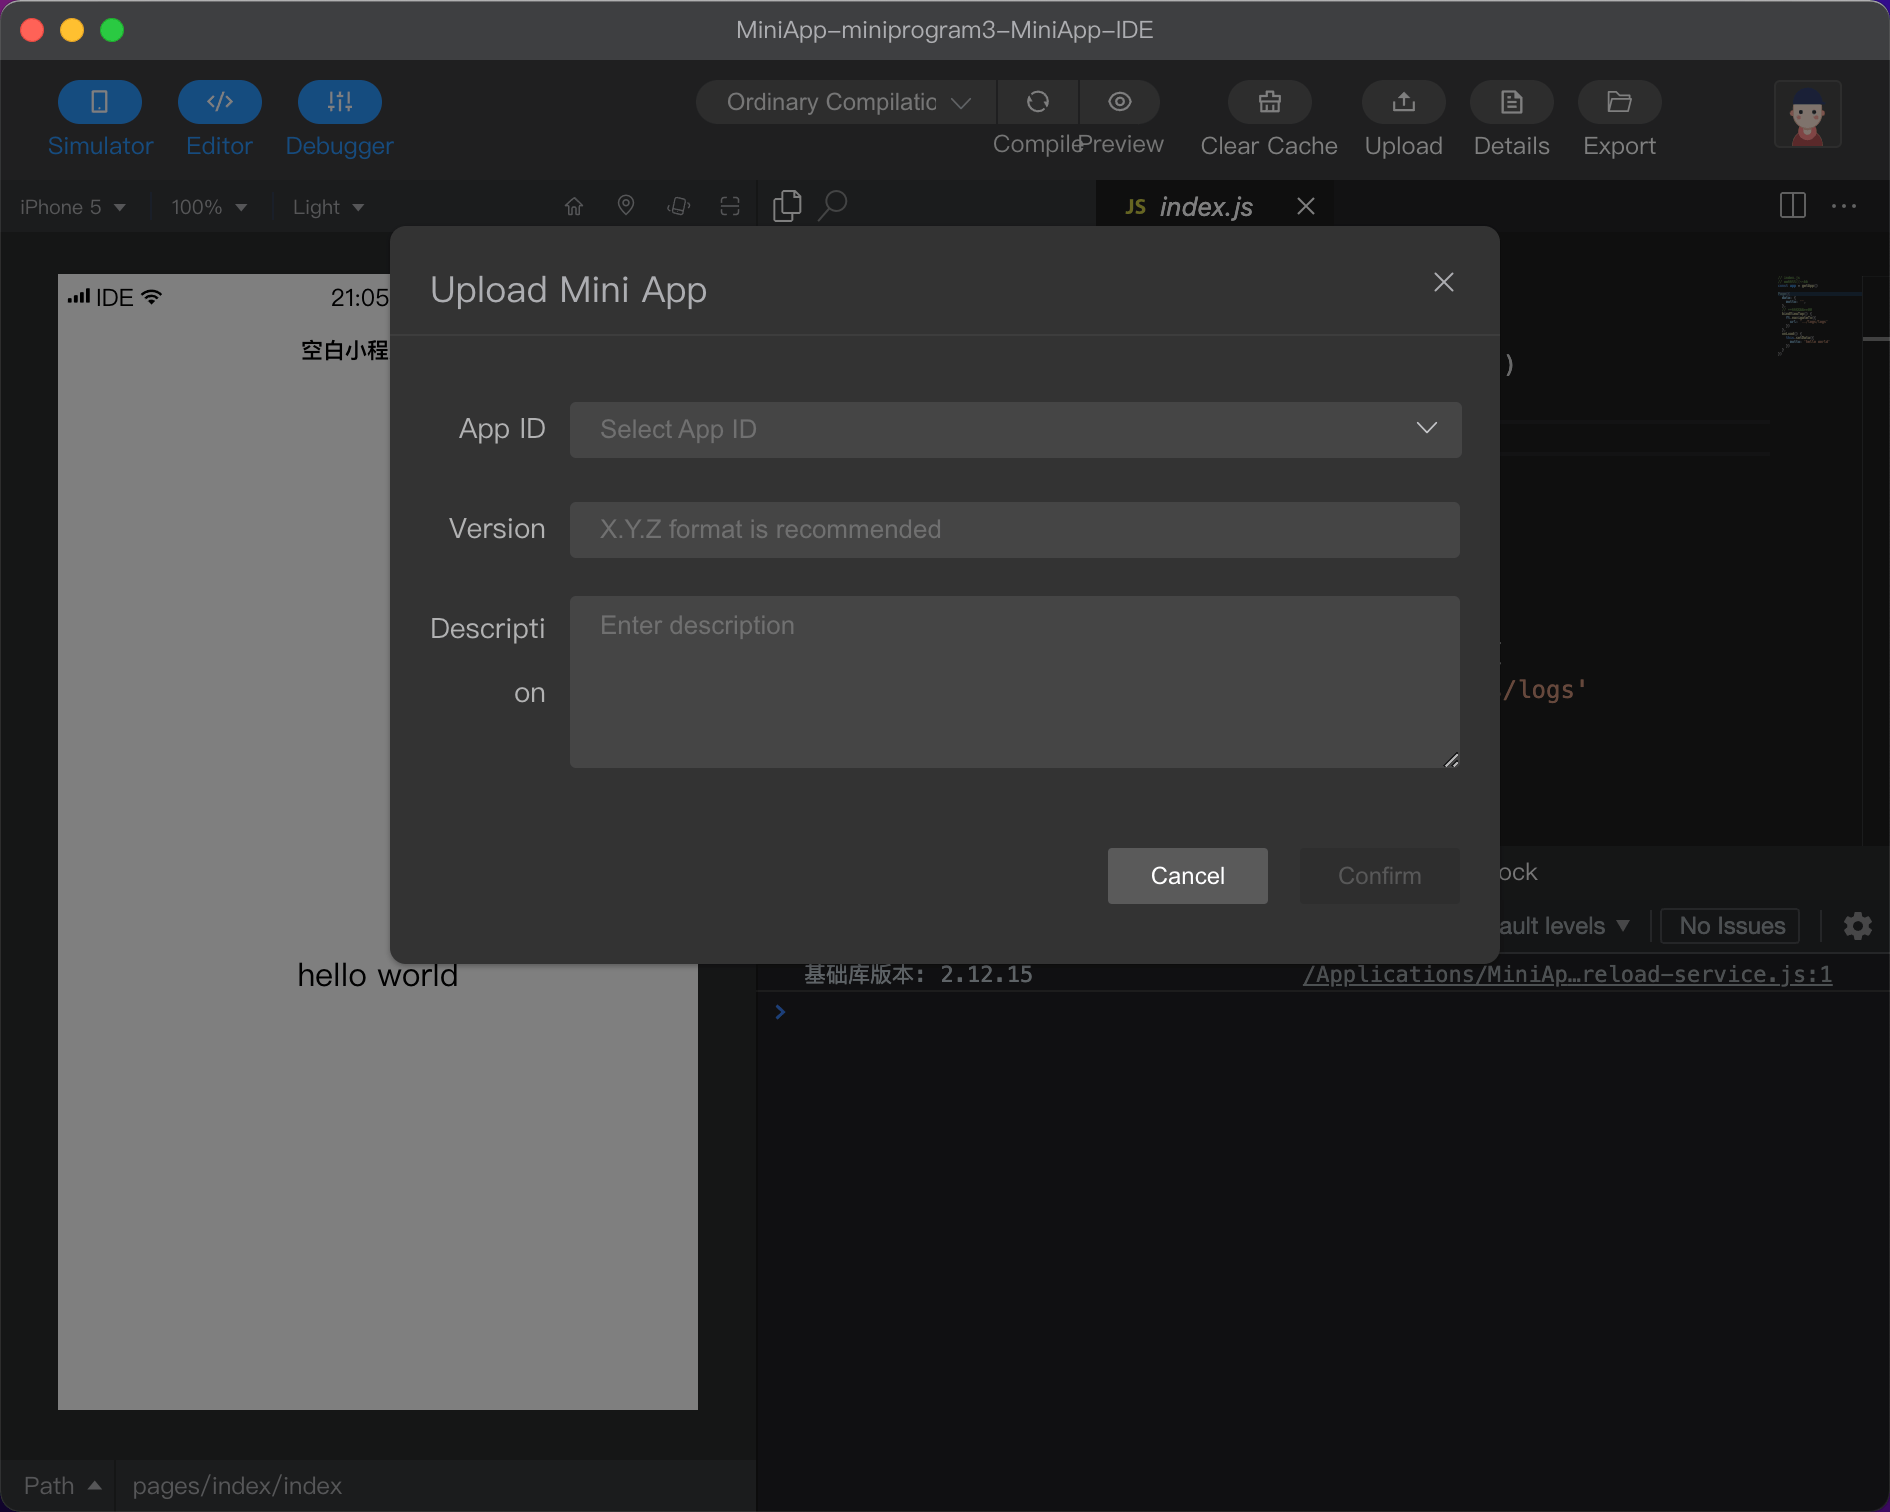 After logging in to the Neuxnet account, click the "Upload" button in the upper toolbar, select the corresponding Mini App App ID and enter the Mini App version and version description information, you can directly upload the compiled Mini App to the background.
# 2. ADVANCED USE OF Mini App-IDE
# 2.1 Mini App-IDE emulator settings
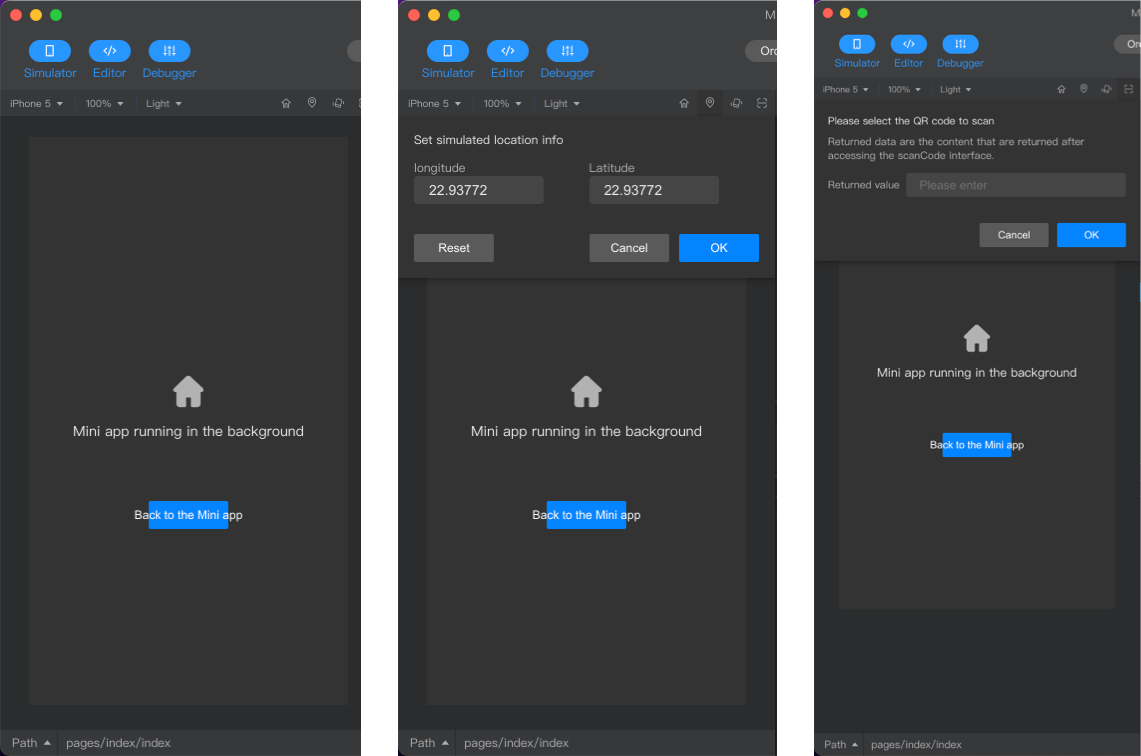 In fide simulator, you can also click the upper operation button to perform the simulation operation of "cutting the background/simulating positioning/shaking/scanning the code" to simulate the relevant business logic in the Mini App.
# 2.2 API Mock
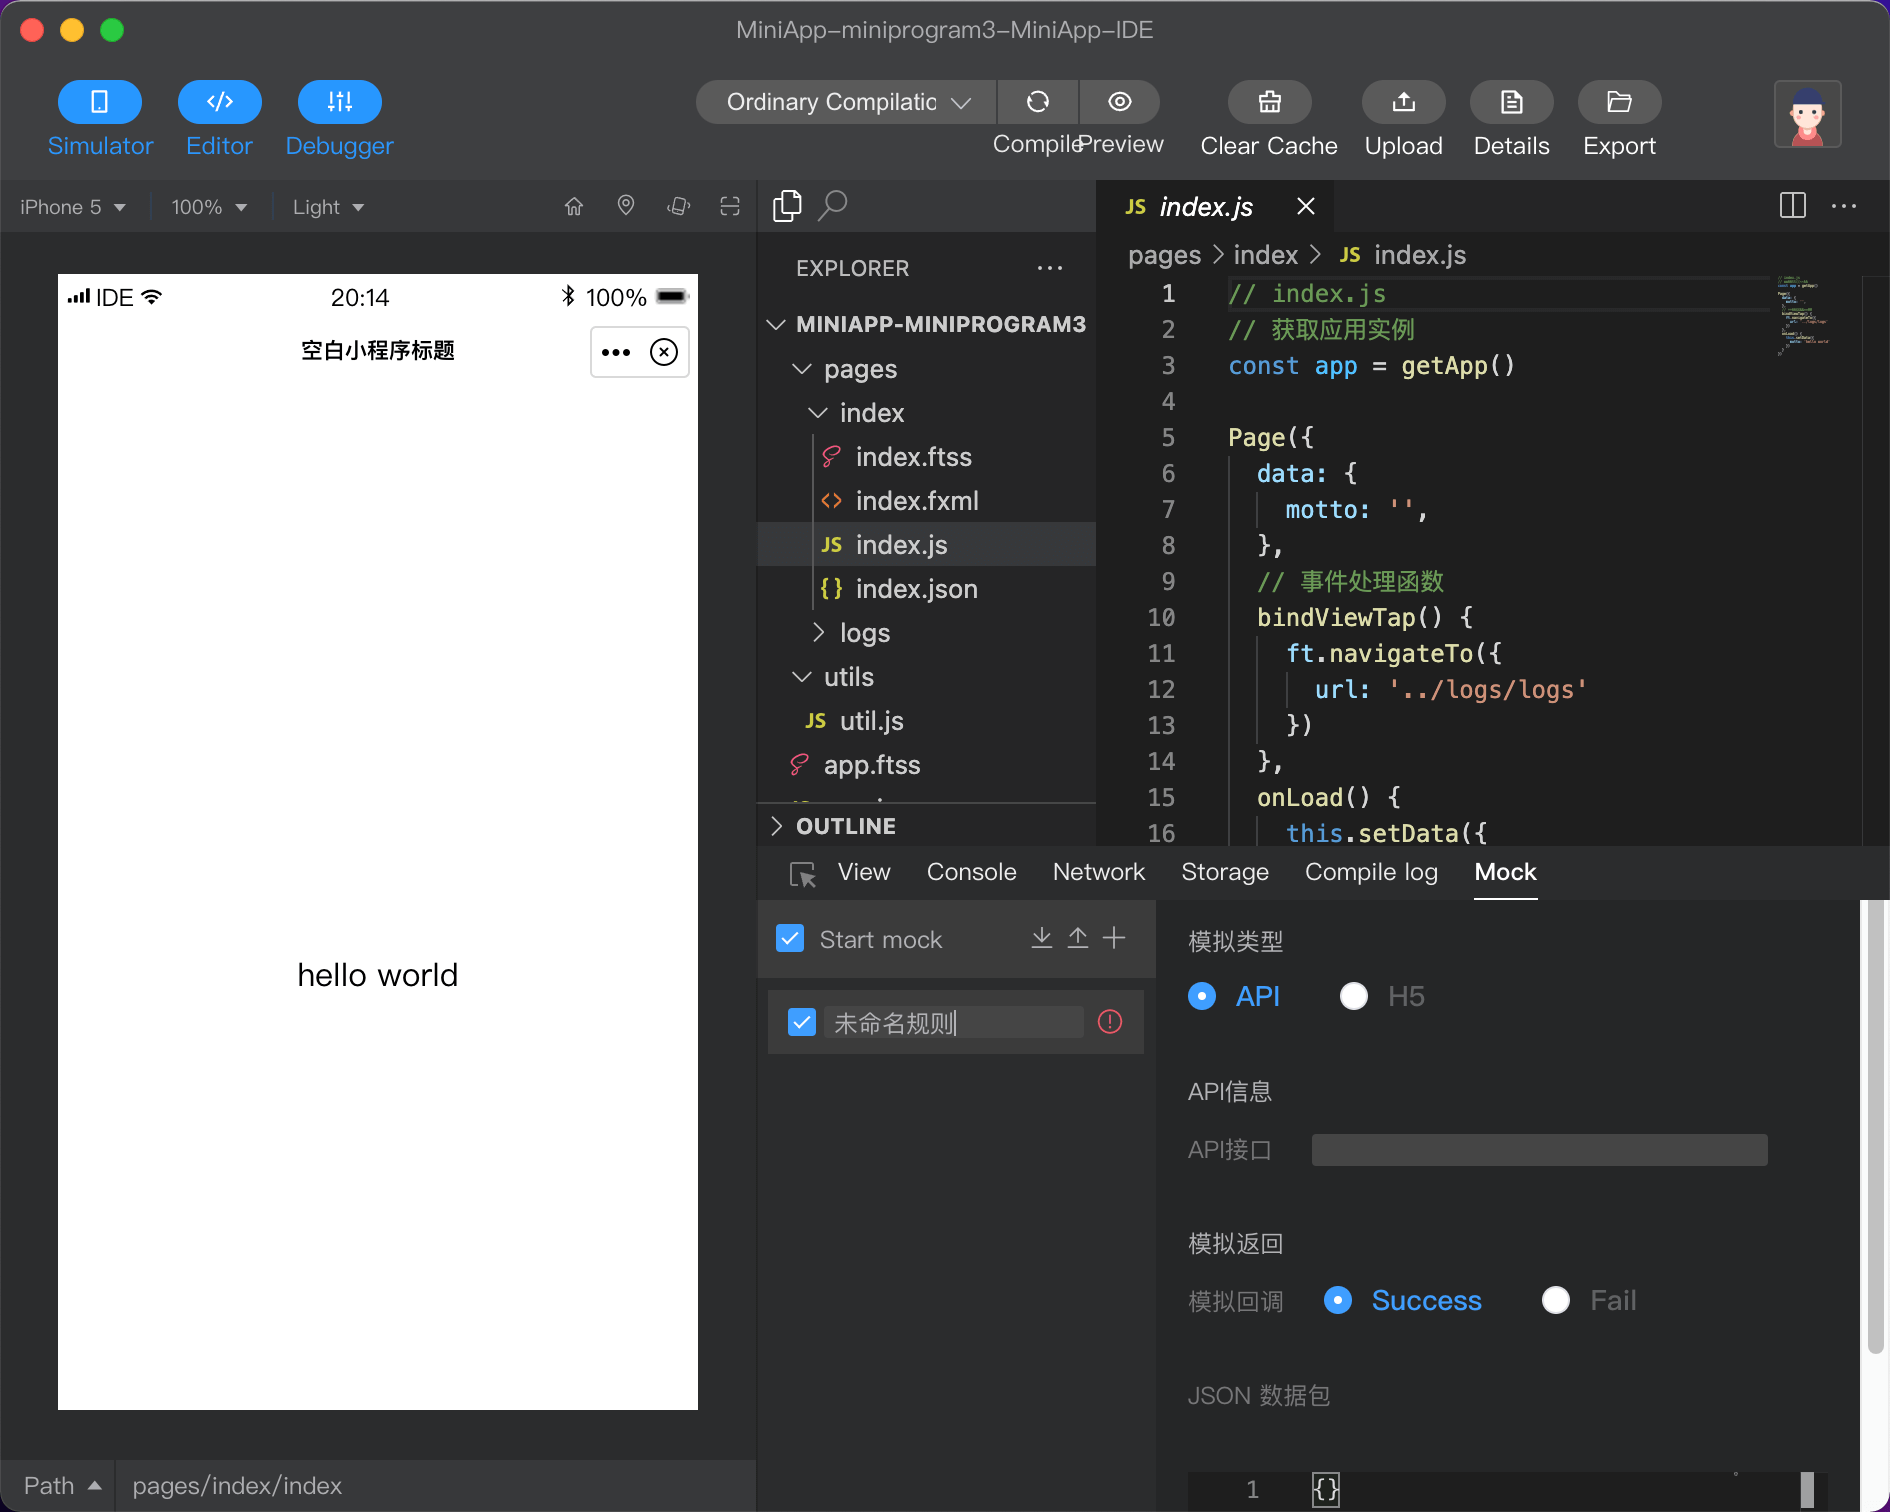 Unlike common MiniApp developer tools, Mini App-IDE also provides API Mock capabilities because Neuxnet MiniApps can be used in developers' own apps. Developers can modify all native interfaces that communicate with the SDK through this function.
For example, the native callback of 'ft.getAppConfig' can be modified via 'Mock getAppConfig'. However, since the field name of the native interface is not necessarily the name of the API interface (this part does not belong to the standard MiniApp SDK interface, but belongs to the part of the underlying implementation of the SDK base library), if the native events of the core foundation are mocked, it may also lead to unpredictable errors, at which time the relevant Mock can be closed.
# 2.3 npm support
# Install npm package 2.3.1
Execute the command in the directory where the MiniApp package.json is located to install the npm package:
The 'package.json' that requires participation in building npm needs to be within the 'miniprogramRoot' definition of 'project.config.js'.
# 2.3.2 build npm
Before using the npm package in the Mini App, you need to build npm first, and after the npm build is completed, the 'miniprogram_npm' directory will be generated in the corresponding directory.
Click on fide's menu bar: Tools -> Build npm.
# Use the npm package after 2.3.3 is built
The npm package is introduced in js:
Use custom components from npm packages (if you only introduce package names here when using npm packages, you will look for index .js files or index components under the package name by default):